 Allsky (or weather) camera is one of the most important parts of the modern observatory.
It’s important to monitor sky conditions during night observations, especially when the observatory is remote controlled or fully automatic. Different vendors provide different solutions. But all they are share the same problems: very high prices, lack of autonomy (PC is required), and lack of useful sensors like temperature, sky temperature, and so on. To build a complete system, you need the camera itself, PC, weather station, and cloud sensor. The full price and complexity of this system are very high.
But this, not a Jedi path, right?
With this article, I’m starting the cycle of the materials dedicated to fully autonomous devices based on Raspberry Pi. This device contains two cameras and a lot of sensors.
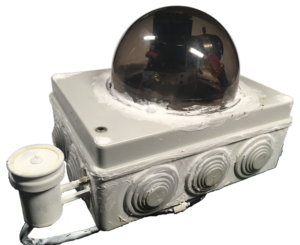
To build this device, I used a small ABS electricity case from the hardware store. I’ve made a hole and glued a 120mm dome from the CCTV camera on the top cap. Also, the IR cloud sensor can be found here. Please read my article about this sensor.
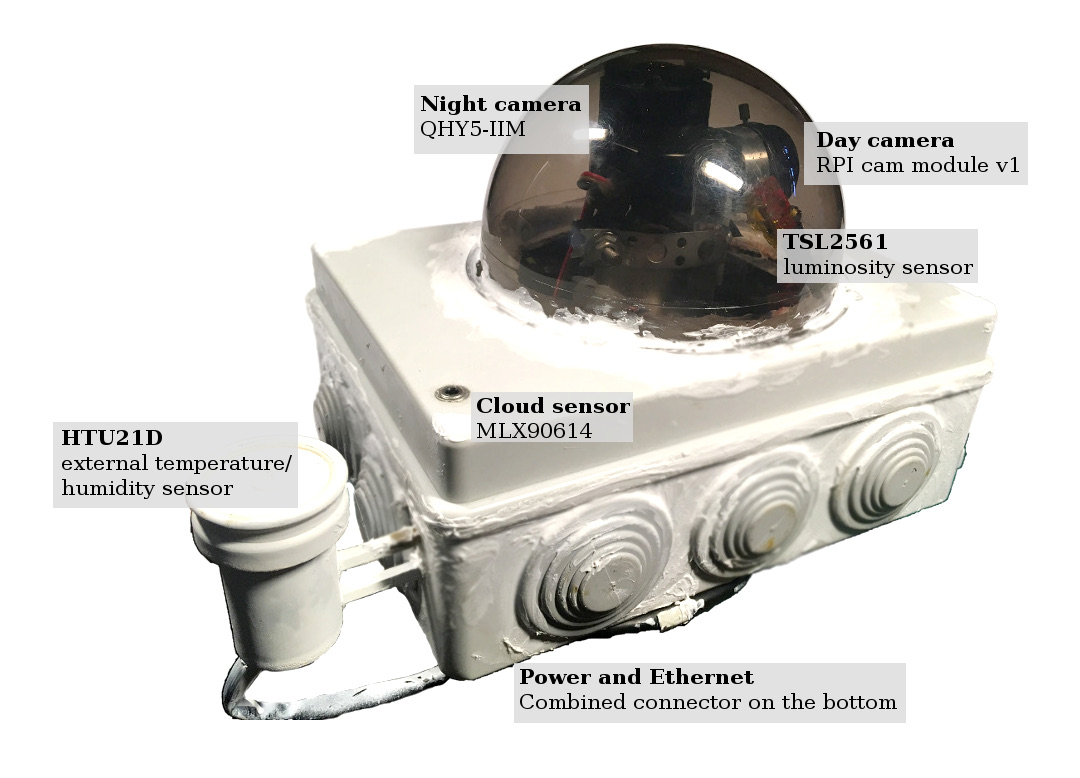 On the north side of the camera box, you can see an external temperature/humidity sensor in a separate aluminum “cup”.
Originally used popular DHT22 sensor, but this sensor appeared to be very unstable and not reliable. After one month, this sensor was replaced with HTU21D. You can read here about this replacement.
Later I will show you what’s inside this cup and how the sensor is arranged.
Cameras module
Two cameras are placed under the dome.
You can see mechanical construction in the photo below.
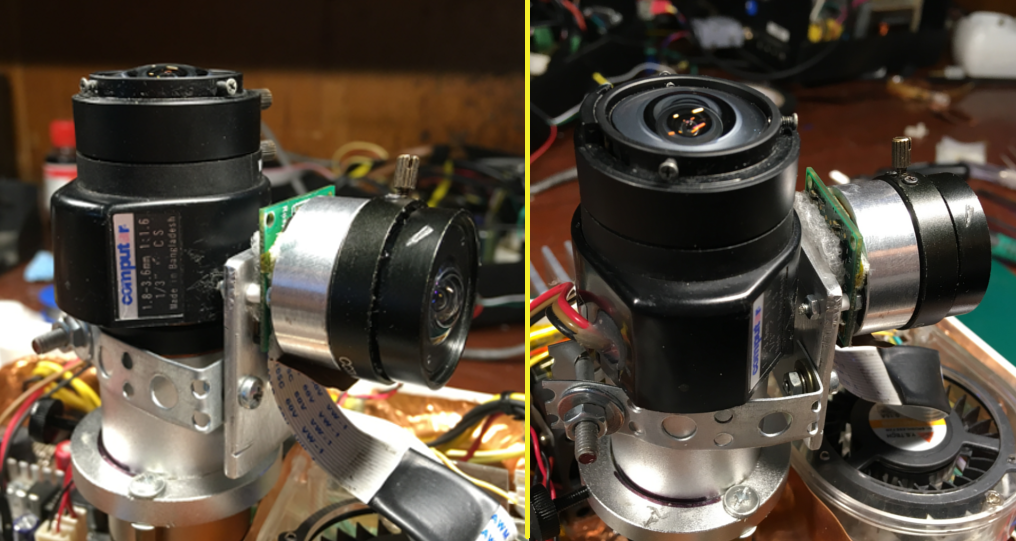 The vertical camera is allsky. This is a popular and cheap QHY5-IIM astrocam. The lens is also CCTV, Сomputar 1.8-3.6mm 1.6
This lens contains an IRIS motor used to close the camera in a day time to prevent damage to the image sensor.
The second horizontal camera is a Raspberry camera module, the first version. This module is also equipped with a CCTV lens using a handmade adapter.
Everything you need to build such camera module is a few PCB stands, an aluminum ring, a stripe, and a small plate.
In the next articles, I will describe how to modify the CCTV iris motor and construct such a module.
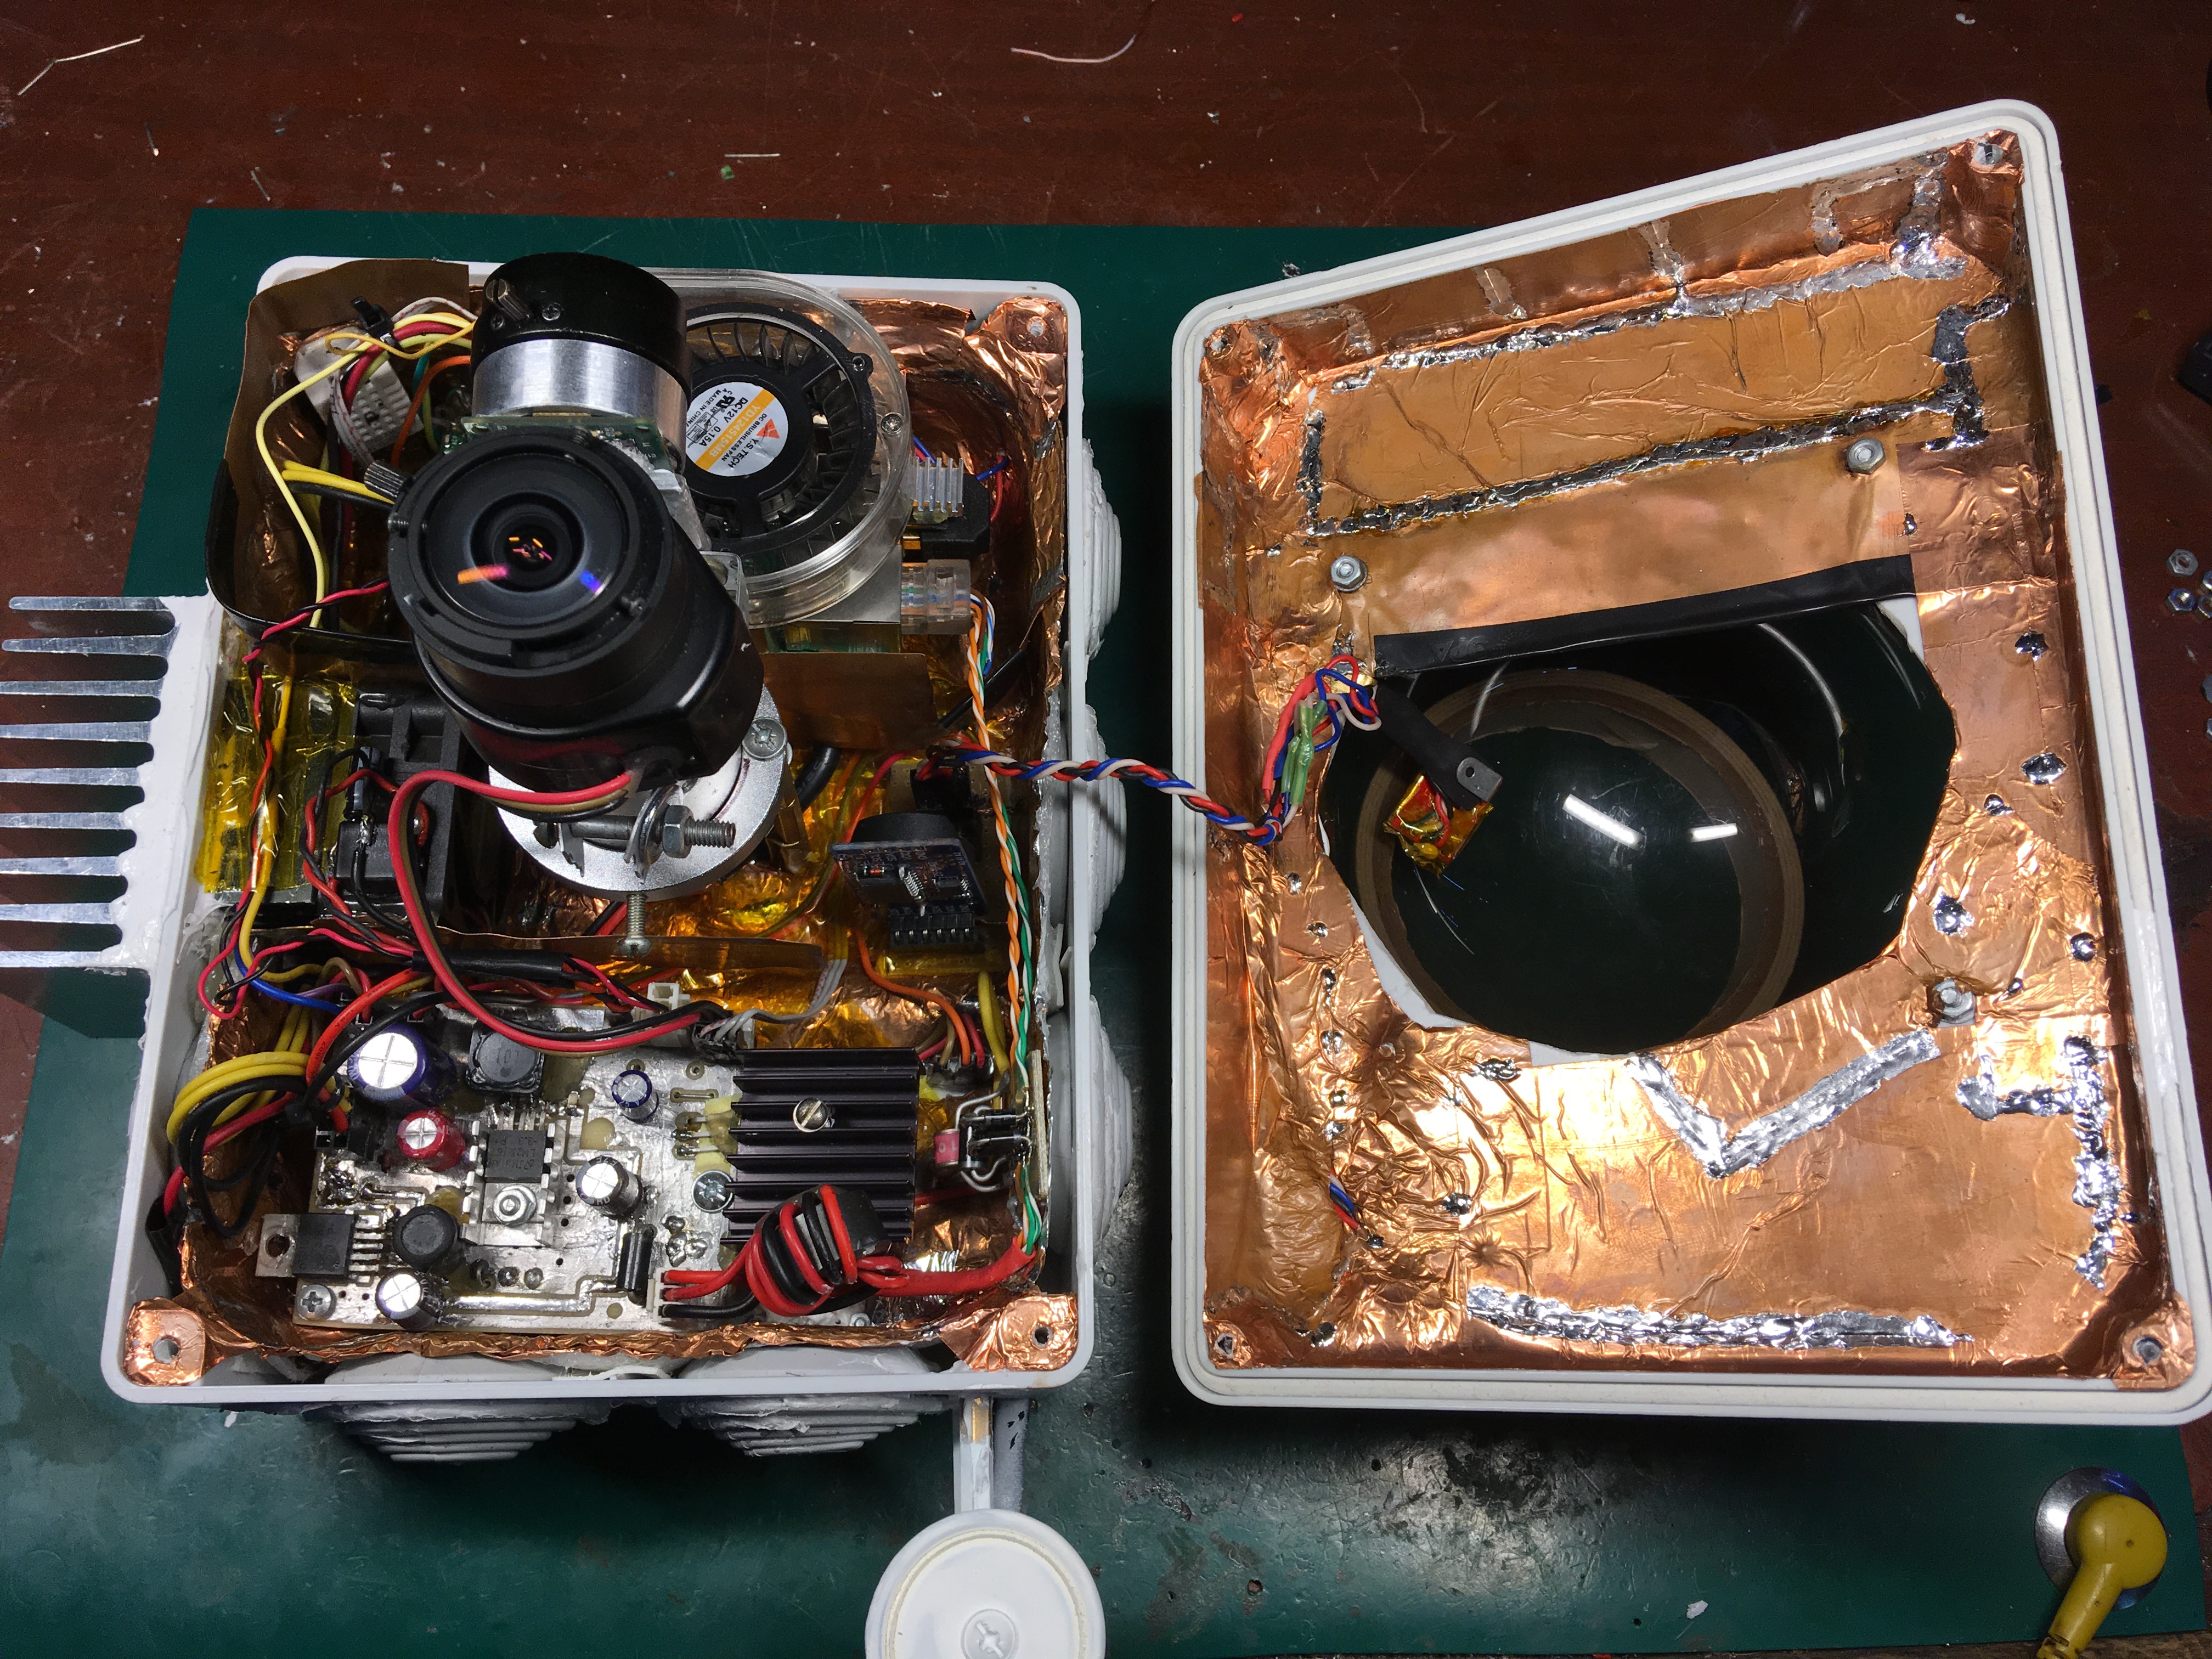
Box internals overview
Inside the box, you can find a few modules: power supply, Raspberry PI 2 computer, protection circuit, and cooling fans.

Since this box is power via Ethernet cable using wide voltage values, I’ve made this special power supply that can produce three voltages:
- 12v using linear regulator for the FANs and Iris motor
- 5v using impulse regulator for the QHY5 USB camera
- 3.3v using impulse regulator for the Raspberry coreAlso on this board placed MOSFET driver for the FANs control. Please read part 2 for details and schematics.
Cooling system
Two FANs are used to pump warm air through the box via an internal heat exchanger.
This exchanger is connected to an external, bigger one, which emits heat to space and ambient air.
This combined heat exchanger was made from the two aluminum radiators.
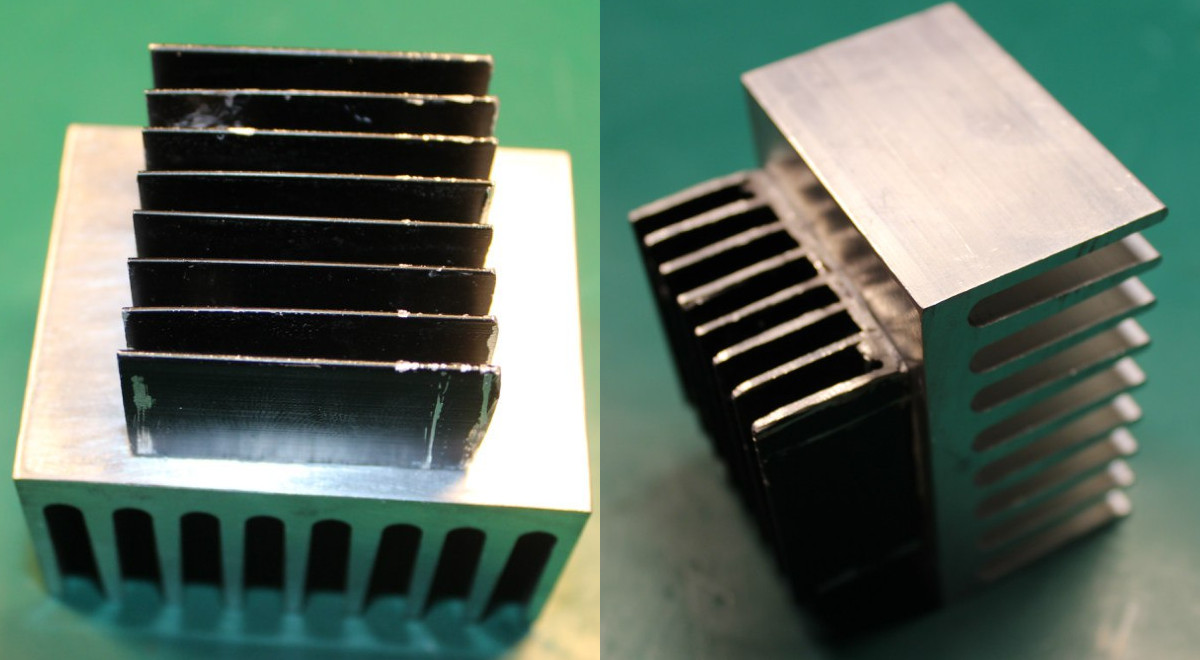 This construction is tested at the hot Crimean summer and works well…
EMI and thermal shielding
The bottom of the box is covered with foil thermal insulation, which supports internal temperature in any weather conditions.
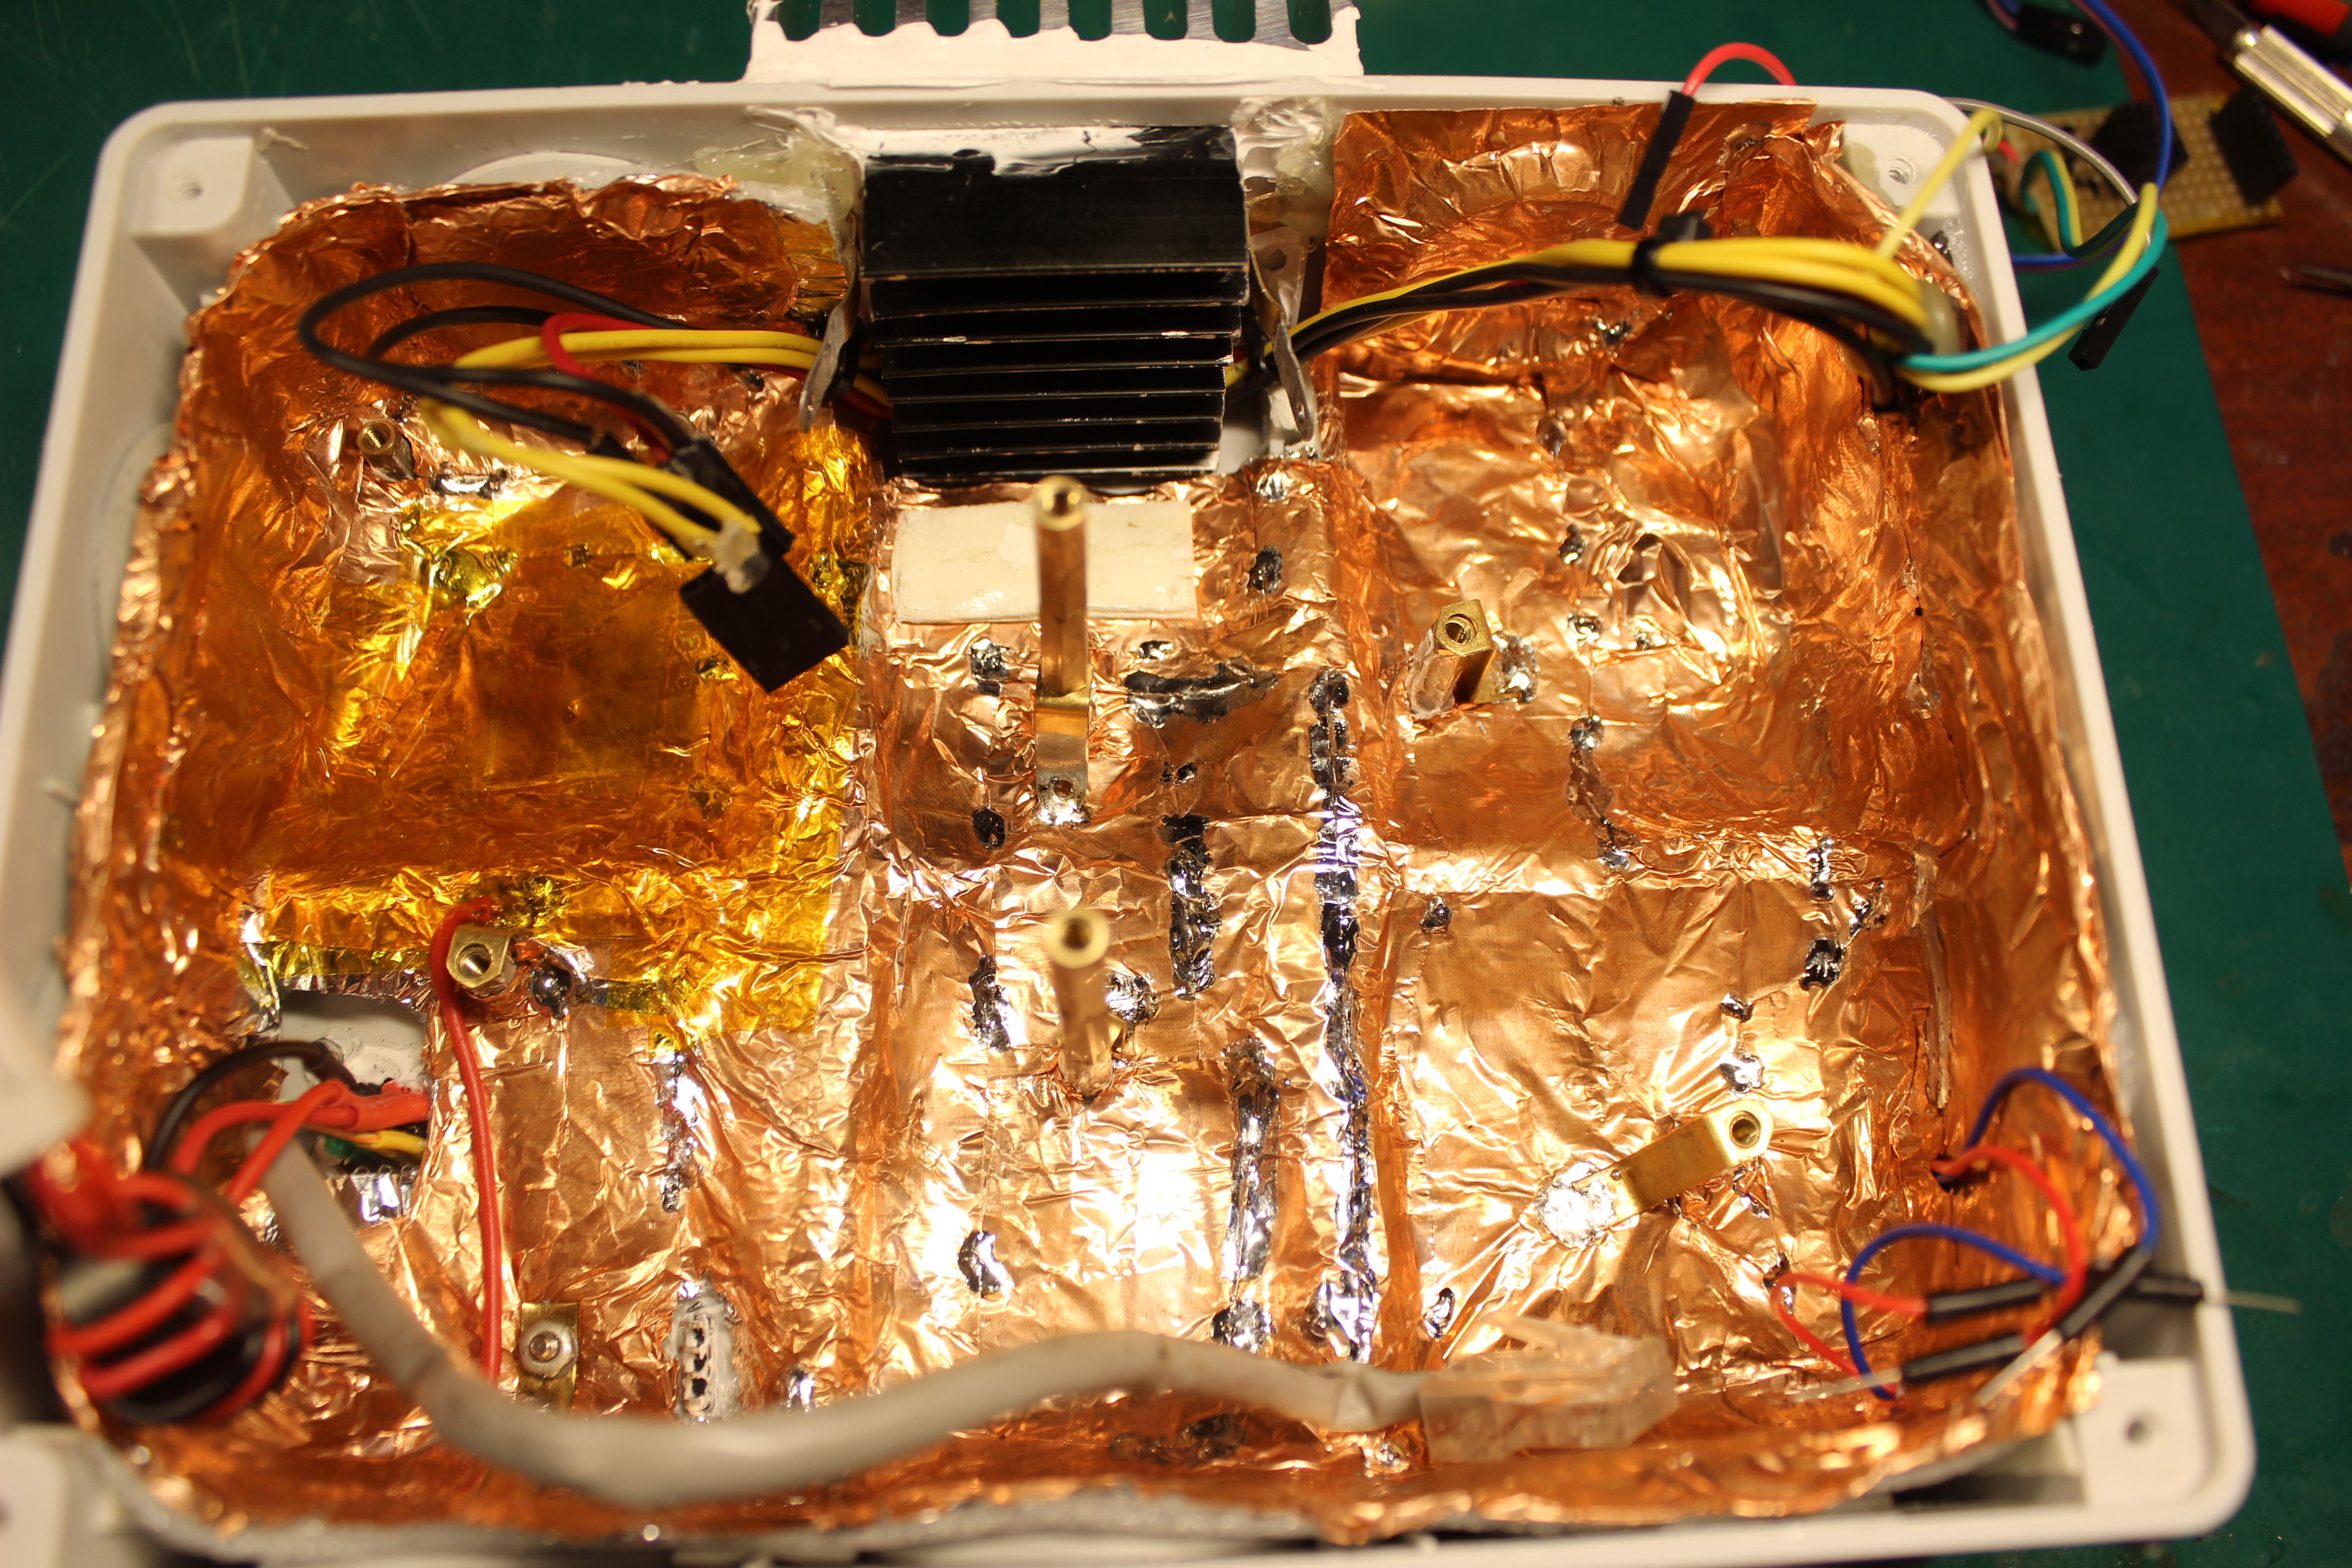
Thermal insulation is also covered with copper foil, which acts as an EMI shield for the whole device.
The top cap is also covered with that foil. Both parts are interconnected at multiple points.
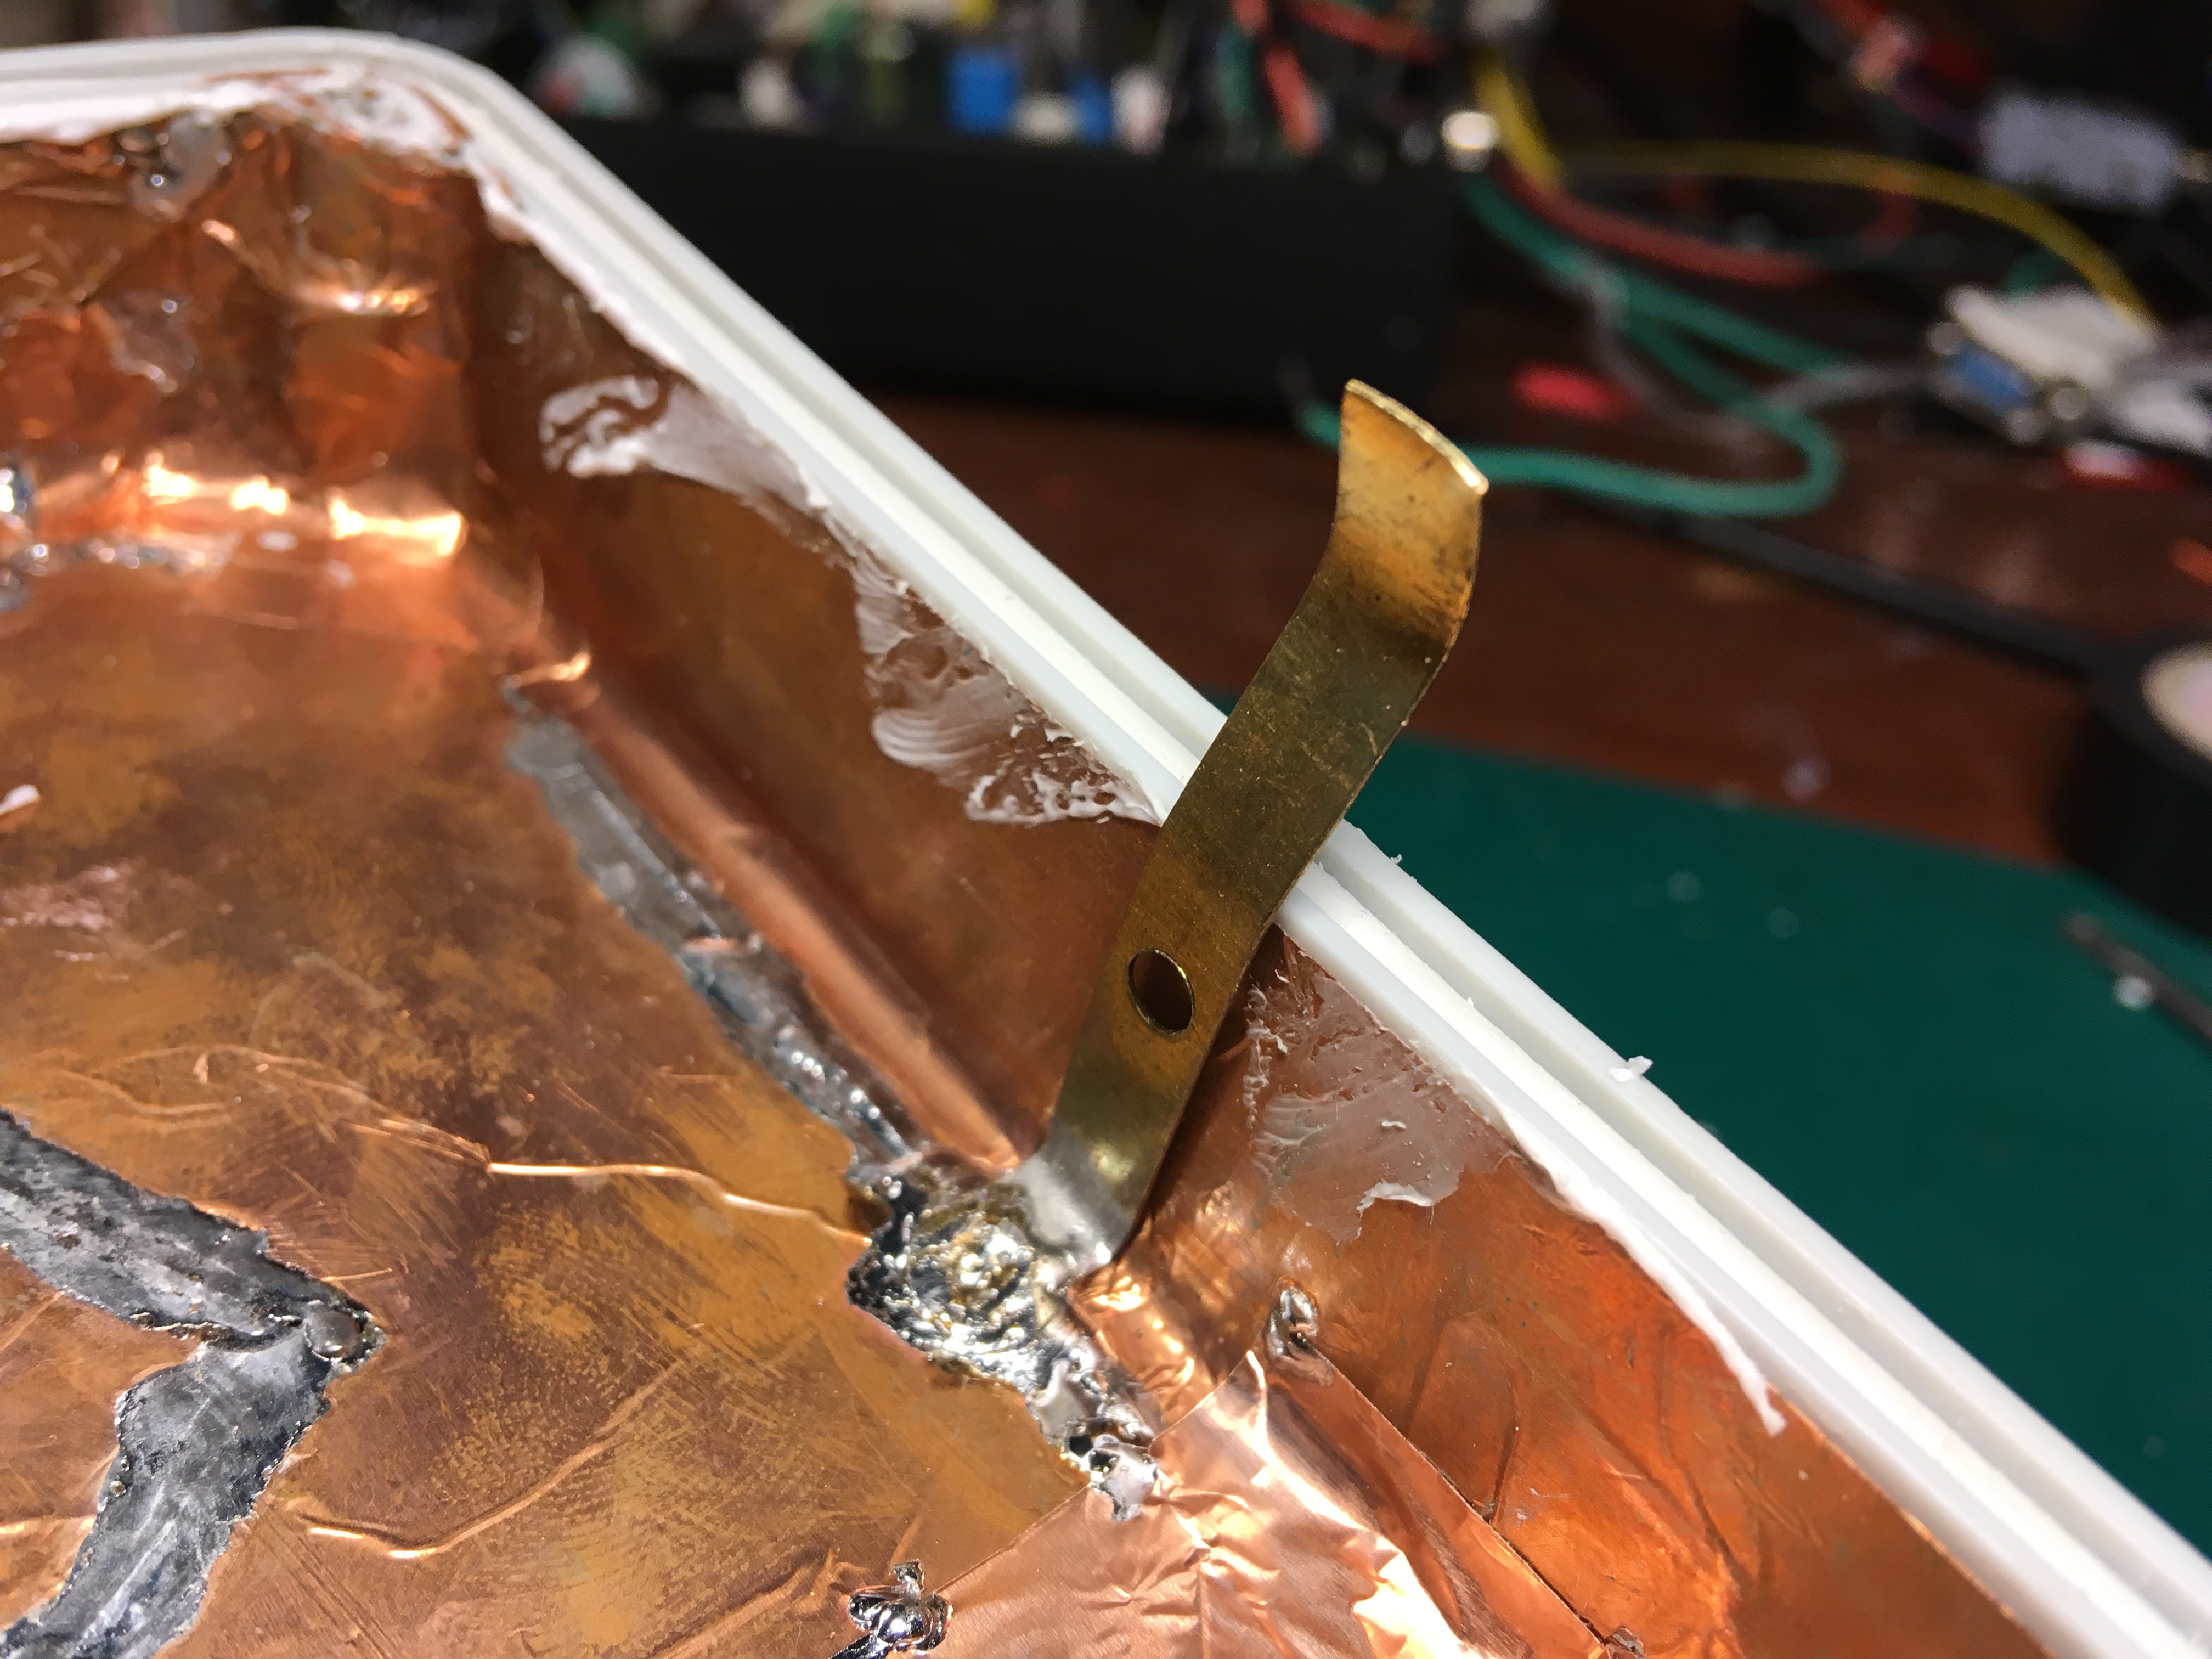 This shield should be properly grounded.
Electrical connections
In the picture below, you can see the schematic of all connections inside the box.
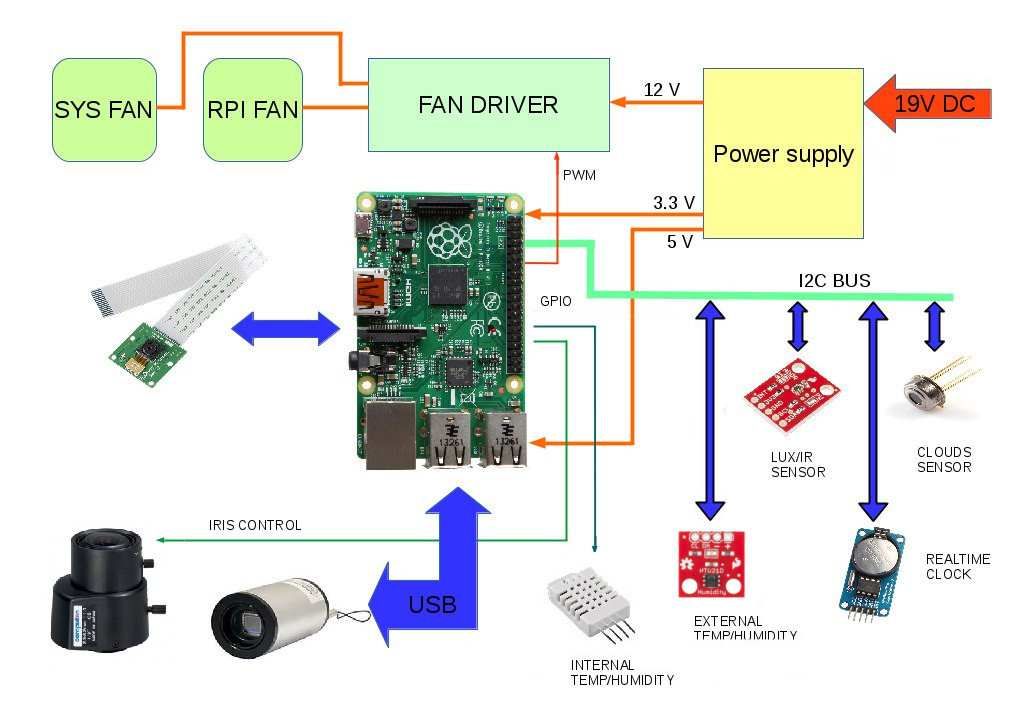 Most of the devices are using the I2C bus, which is very convenient.
External RTC is used to restore system time after power or internet failure.
This is very important for database consistent.
The internal temperature/humidity sensor is still DHT22 due to the impossibility of using the two HTU21 sensors on the same I2C bus. Second (i2c-0) is unusable due to the Raspberry camera module, which uses this bus somehow.
Camera sample images and data
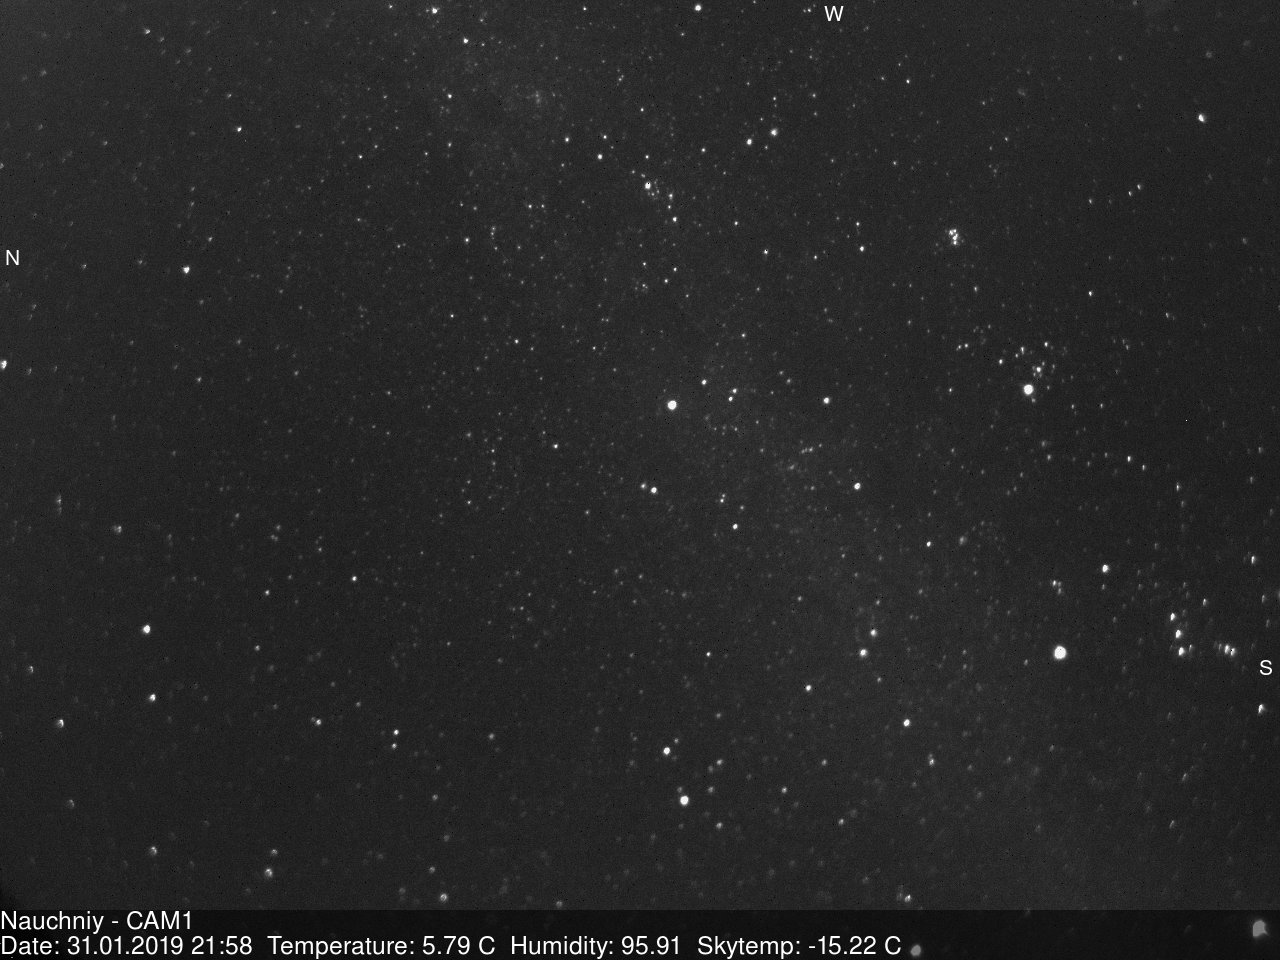
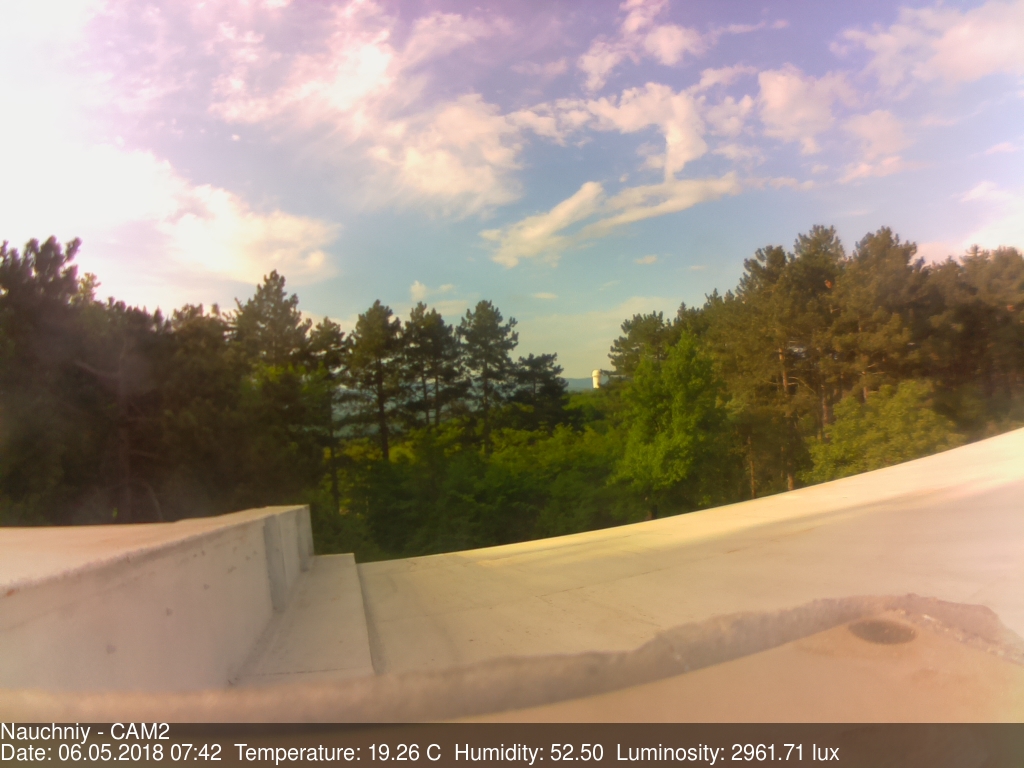
As you can see, there is a lot of additional information on the pictures.
This is actual data about camera ambient conditions.
Images from both cameras are used to generate time-lapse videos.
After generation, all videos are uploading to the Camera Youtube channel. Check it out.
A separate script makes generation and uploading on a separate machine, and it’s not an actual part of the camera.
The Raspberry runs the Nginx web server to support the web interface of the camera.
This interface is pretty simple and convenient.
The whole web page looks like that in the day time:
And in the night time:
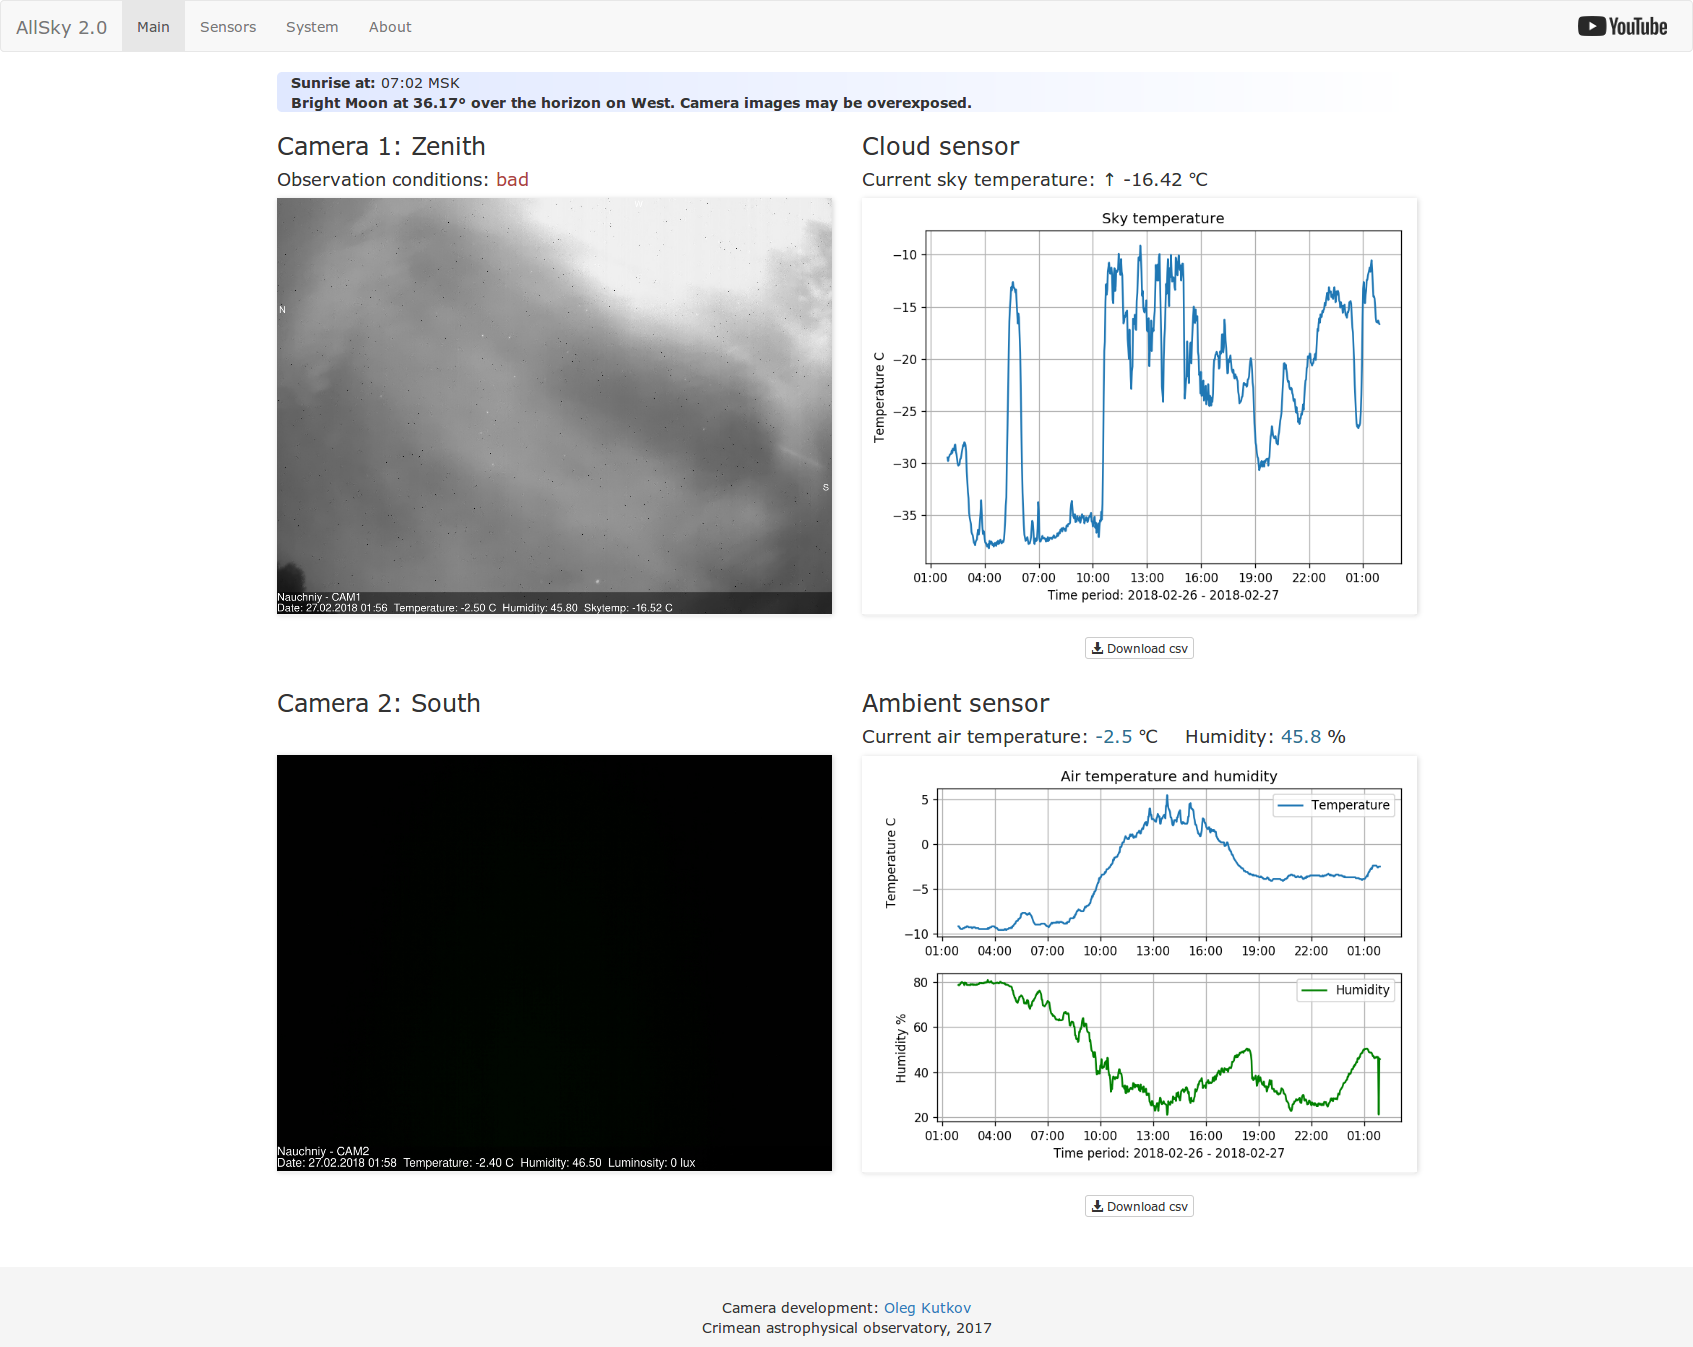
You can see there a lot of other information like sky temperature and ambient conditions.
Also, camera software generates additional useful information about sunset, sunrise, and bright Moon.
All the camera software will be described in the next articles.
There are many bash/python scripts, C/C++ utils, CRON rules, and so on.
You can explore all software on my GitHub repo.
End of part 1.
Part 2: powering and lightning protection
Part 3:shooting night sky in FITS using QHY5-IIM camera
Thanks for reading!
thank you for uploading this project, this is a project i have been trying to get done, this is the best one i found so far