 Everyone would agree that the proprietary SPX connector isn’t the best solution. Sometimes it fails, especially when frequently connecting and disconnecting. And there is no easy way to repair or replace this connector.
In this article, I would like to show a method of reworking the Starlink Gen2 router to RJ45 (it’s 8PC, but…).
Wires connection
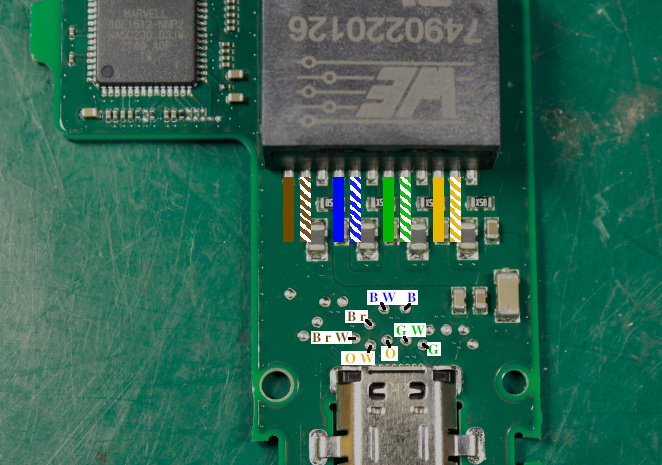
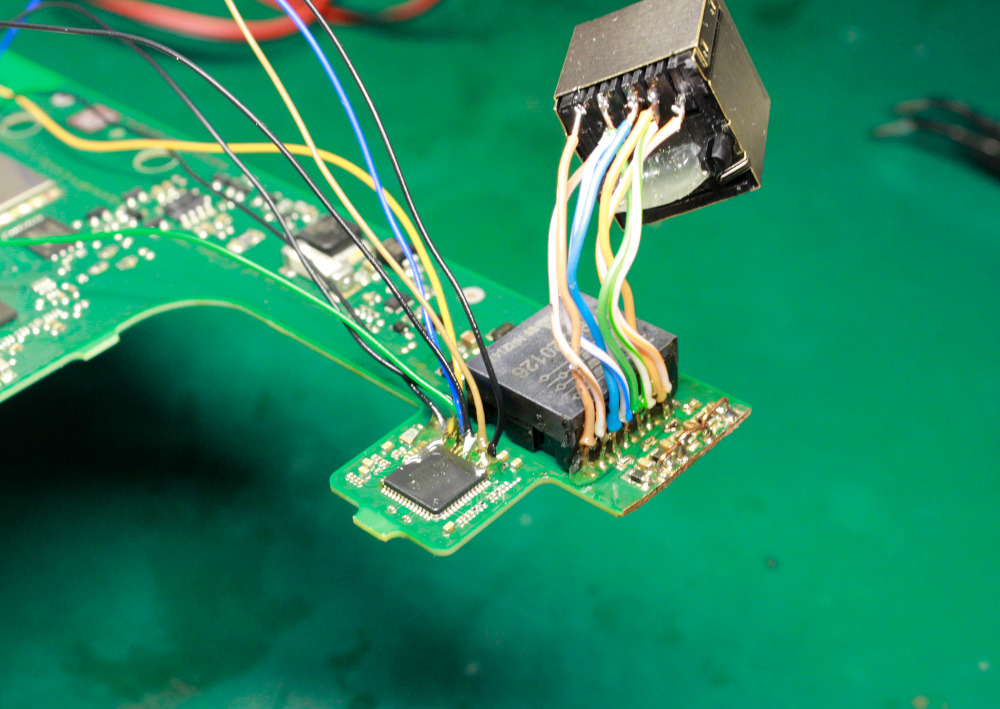
The best way to get Dishy’s Ethernet lines is to connect directly to the Ethernet transformer.
There are no extra components between the connector and this transformer. The pinout:
Also, I marked the appropriate test points (just in case). All lines could be used as is. You can solder your twisted pair directly to the transformer’s pins, and you are good to go.
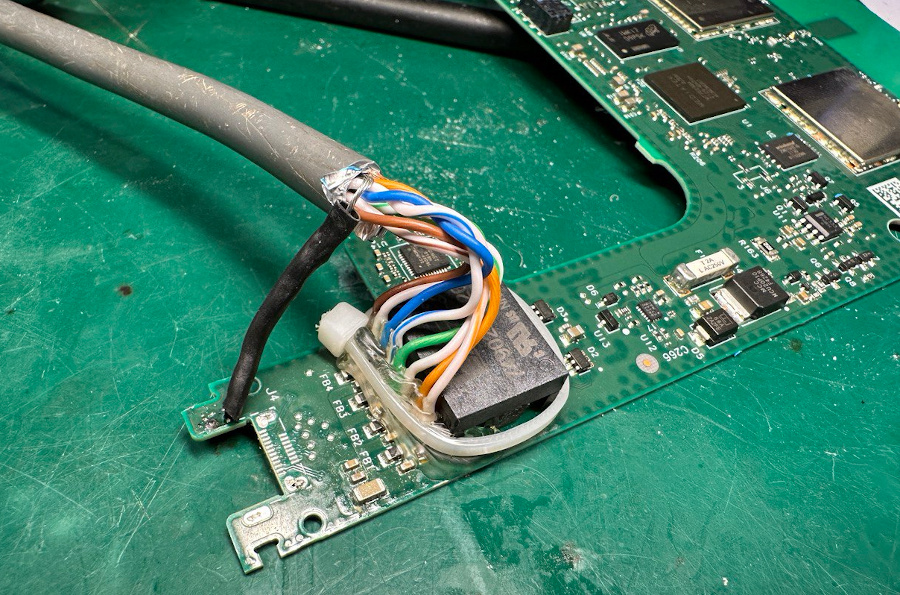
Here is an example:
Don’t forget to connect the grounding wire.
Socket installation
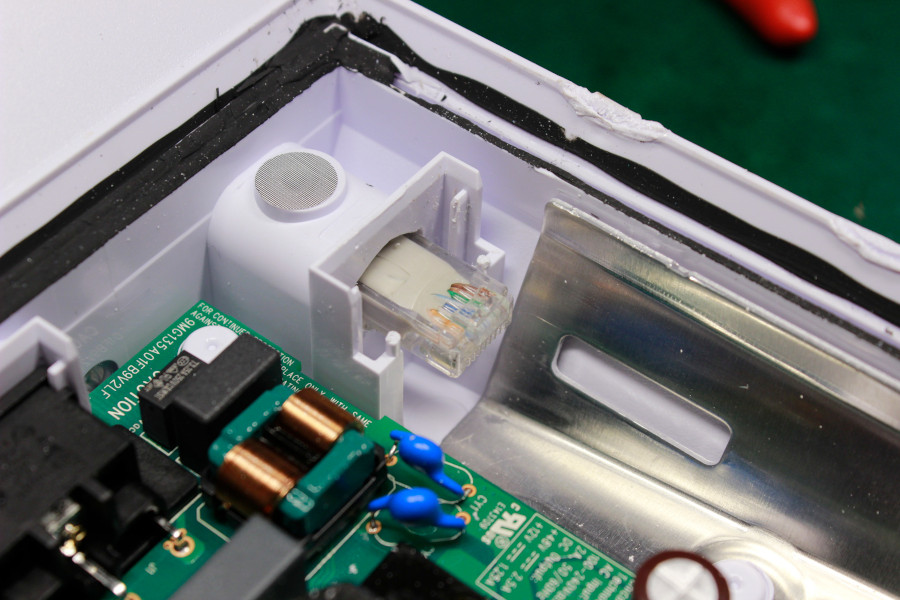
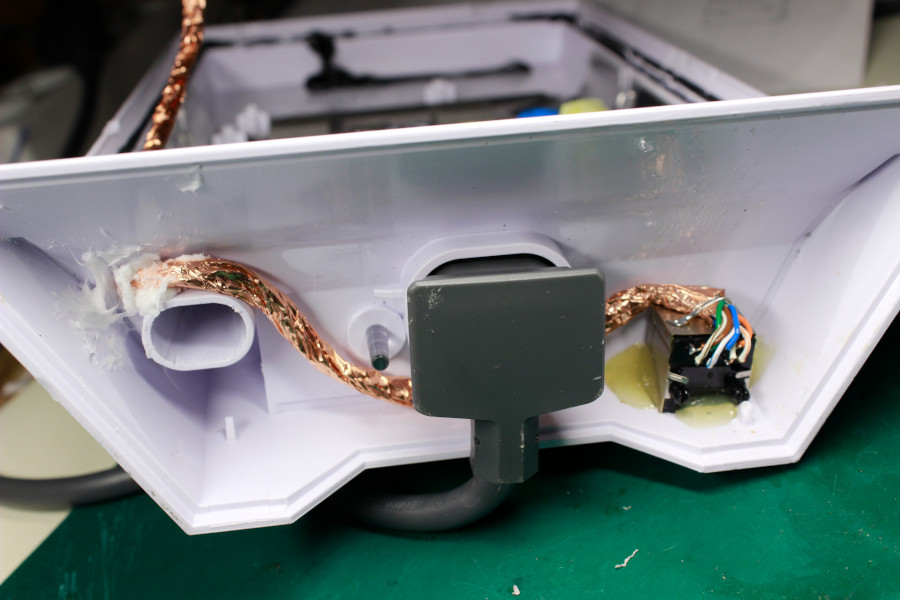
At this moment, you can improvise and find your solution. I decided to keep the router visually intact and physically replace the SPX connector with RJ45.
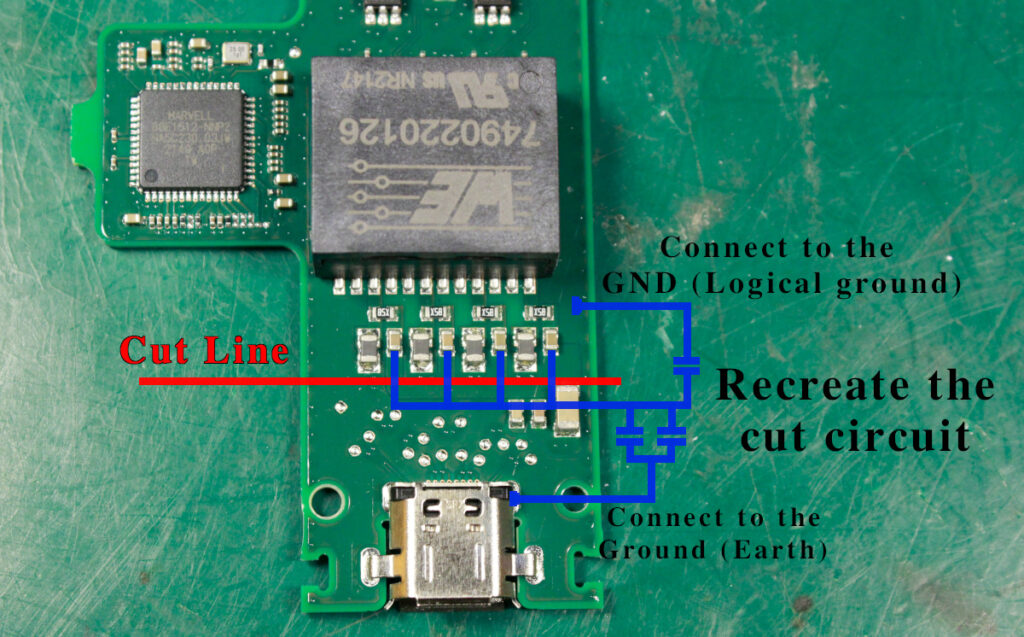
I found that the RJ45 socket fits nicely if cut the PCB.
And it requires extending the bottom hole for the RJ45 plug.
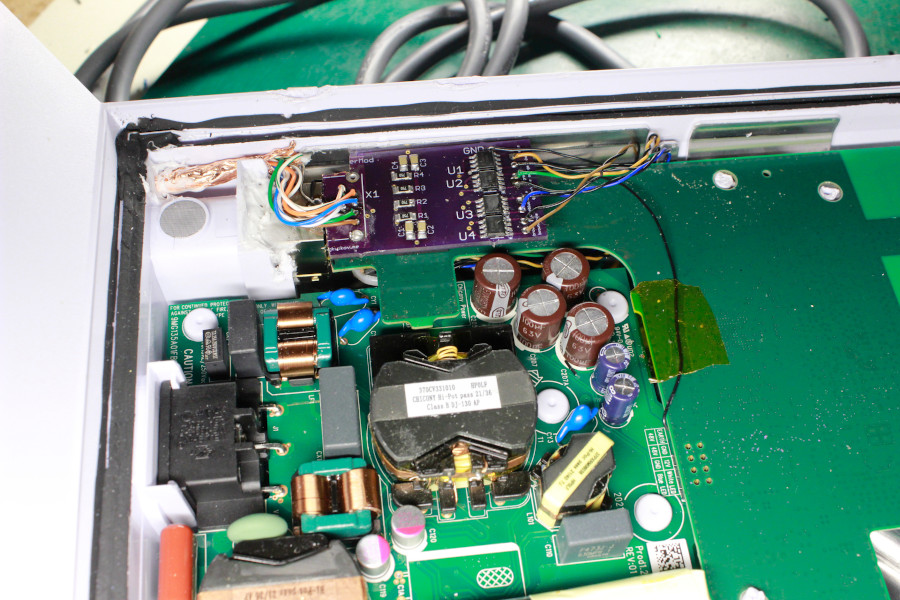
Cutting the PCB requires a minor rework and rearranging of components.
You may note that with PCB cutting, you lose LAN connectivity. Solving this issue requires a direct connection to the PHY IC and EtherMod I described in my previous article.
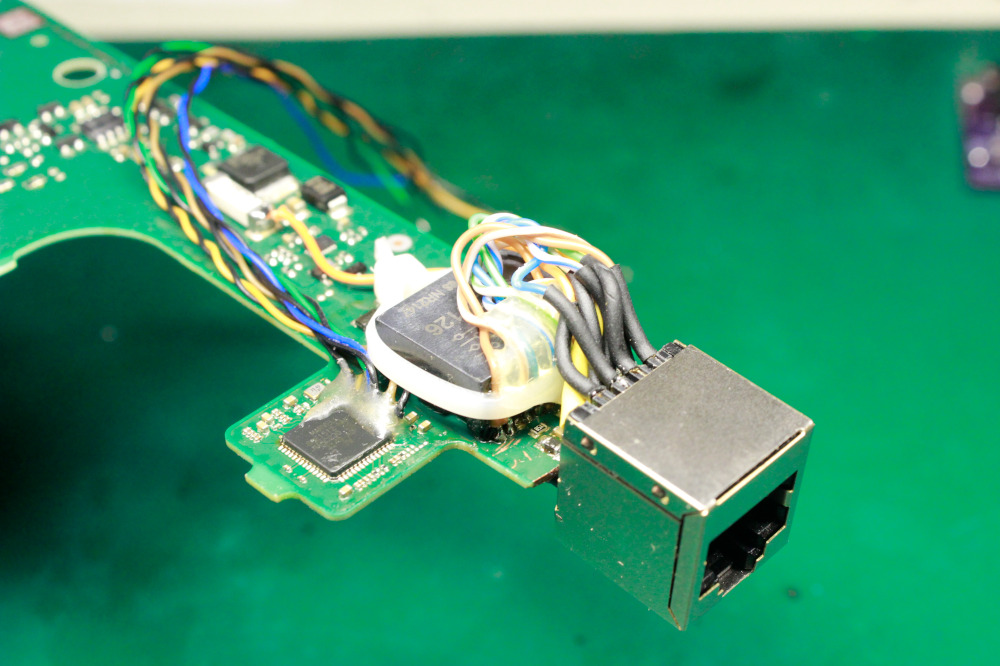
Work in progress:
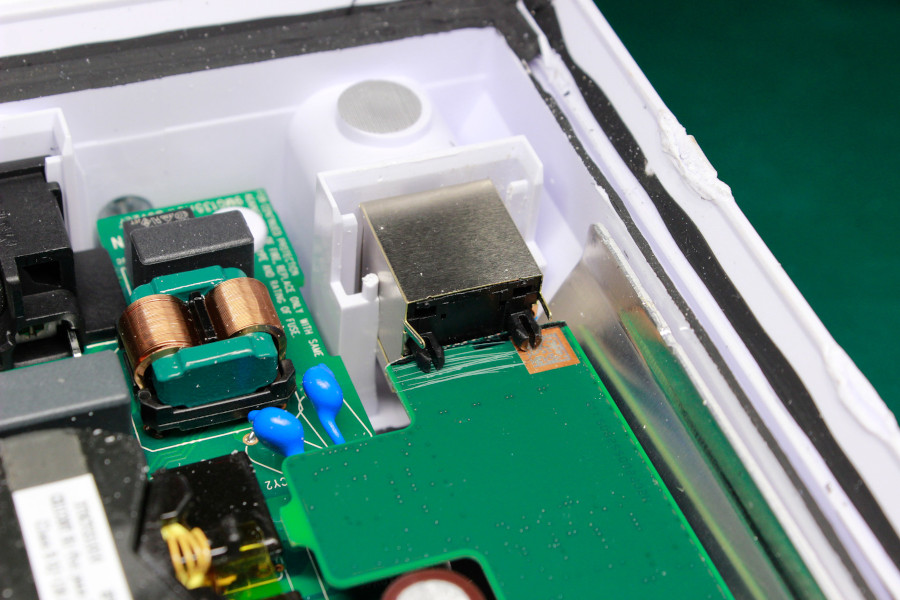
And ready to install:
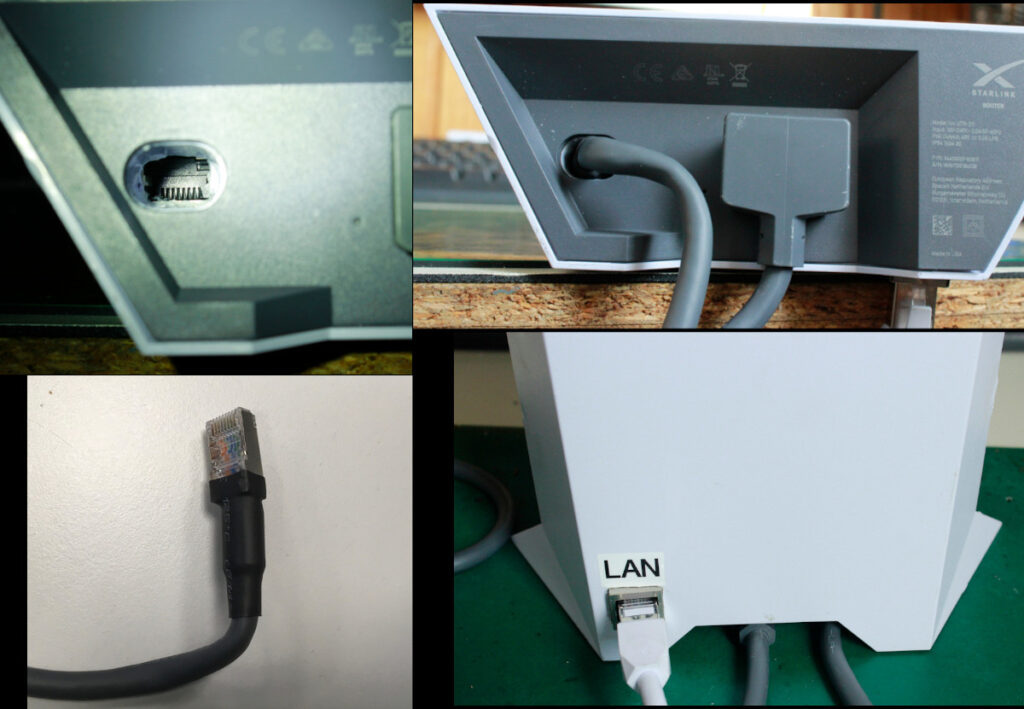
The LAN port is installed inside the stand, as in the previous article:
You can see an extra wire that brings “Earth” to both RJ45 connectors. All the ground wires are connected in the same spot.
The new RJ45 socket is secured with a sealant that gives enough mechanical strength and protects it from dust and water. Sure, it’s not the perfect protection, but it should work fine if the router is not drowned by purpose.
I used a heat gun to bend the Dishy cable. It holds the shape nicely.
An additional thermosetting tube adds protection and friction that helps to fix the connector inside the router.
Thanks for reading!
Hi Oleg, wanderful job! I have a project: flat starlink antenna with original starlink router inside. Using your scheme I can connect router board directly to antenna. Is possible to use your 12v mod for antenna? At the end I can connect antenna only with a 12v wire not too long.Easy, light and useful to reach starlink antenna with only 12v wire.
Many thanks from Italy
Can the Starlink router be used after this modification and the Starlink dish modification to 12v and not use Poe?
Yes, you can use the Starlink router. But I recommend using a better router (actually, any other) you like.
I love your research and I hope i’ll get my Starlink working again.
my starlink power supply/router has stopped last working because of heat. Now I made the router 12/48 with some soldering. the internal power supply is therefore no longer used. Now I have WiFi again, but the dish restarts every 41 seconds? Can I measure voltage on the 8 wires to check if the proprietary SPX connector is working correct and the 48v going to the dish?
If you can help me that would be great.
Thanks Rob
Hello Rob,
It looks like your 48V power supply is not powerful enough. Dishy takes more power on boot.
You can measure the voltage on green/orange (+) and blue/brown (-) pairs.
Hi Dear
My Starlink Gen 2 got wifi connection but in apk unplugged or rebooting. Please Help me and how to solve.